contact us

Use the form on the right to contact us.

You can edit the text in this area, and change where the contact form on the right submits to, by entering edit mode using the modes on the bottom right.​


123 Street Avenue, City Town, 99999

(123) 555-6789

email@address.com


You can set your address, phone number, email and site description in the settings tab.
Link to read me page with more information.

Craft patterns

​In which one may learn many useful things, such as how to knit a bat or needle felt a bunny.

Filtering by Author: Terri Reinhart

Mouse Army

Terri Reinhart

IMG3260.jpg

It's been fun getting back into knitting again, especially after finding so many cool patterns through Ravelry. One of the mice is named President Tom, I'm not sure why, it's what my grandsons named it. Other names are Snowy, Crumbs, and Bagel Grease. I can't remember the names of the dog and the dragon. Together they make up President Tom's army and they gather together in a plastic Bat Cave toy that's meant for Batman superhero figures. It was given to us by our neighbor. I'm glad we don't have the superheros that belong to it. The mice are happy there. So are the grandkids.

Links to the pattern pages on Ravelry (and other pages) The dragon isn't on here because I made it up:

https://www.ravelry.com/patterns/library/freddie-the-field-mouse

https://www.ravelry.com/patterns/library/toerag-the-tube-mouse

https://www.letsknit.co.uk/free-knitting-patterns/easy-puppy-trio

Protecting wool from wool moths

Terri Reinhart

This advice comes from Ruth Walker (www.feltmaker.com)

Make sure your wool is clean before you store it.  After you clean it, put it in a brown paper bag that is double folded and stapled at the top.  Wool moths will chew through plastic bags to get to the wool but they cannot chew through the paper.  

Great.  

Attach a small amount of the wool to the outside of the bag so you know what's in there and don't have to open it to look.

This means that I have a weekend long project ahead of me.  In fact it may take several weekends to accomplish this.  Since I use many colors and types of wool in each project, I'll save out one small basket and watch it carefully for signs of moths.

I have found some sites that tell what to do to get rid of the moths once they find your wool.  Here are some of those suggestions:

1.  Moth larvae do not like light.  Take wool sweaters out of closets and drawers every couple of weeks (life cycle of moth is 21 days) and shake them out or hang them out in the sun.  This might work for our craft wool, too.  If the sun decides to stay out for awhile, I'll try putting my wool in a mesh bag and hanging it on my clothesline.  I'll shake it up a bit for good measure, too.

2.  Wash in hot water (above 120 degrees F).  This is supposed to kill the moth eggs and larvae

3.  Freezing is also supposed to kill the moths.

4.  There are various chemical concoctions available but I cannot speak to how safe they are.  I haven't found anything yet that I would trust to be non-toxic.  

If anyone else has other suggestions, please post them here!  It is so discouraging to open a bin of wool and find that it's being eaten away.  

Needle felted bunny

Terri Reinhart

This little bunny is fun to make.  If you haven't done any needle felting before, this would make a nice first project.  To get started, you will need:

Felting needles - have more than one on hand in case one breaks

Soft sponge as a base for your felting

Wool fleece in grey, brown, or white, with a tiny bit of black and white wool for details

Pipe cleaner

*****

Directions:

Bend your pipe cleaner like this:                        


Begin to wrap the wool tightly around the ear as shown:  


Wrap the wool tightly around the pipe cleaner until you cover the top curve of the ear.  Then bend the pipe cleaner down and continue to wrap both sides together.  Do this with both ears.  It will look like this:

Now you can begin to use the felting needle to secure the wool.  Continue wrapping the wool around the body, wrapping around the bottom curve as you did for the top of the ears.  Use thin bits of wool and wrap tightly.  Secure each layer with the felting needle. The more felting you do with the needle, the tighter and sturdier the rabbit will be.  Wrap both the body and the ears, felting each layer, until it is the size you want.

Pay attention to felting in between the ears and felting the bottom so the bunny can stand up.

At this point, your bunny may look more like an insect.  This is normal.  If you have a six year old son, you might decide to stop here and let it be a bug.  Otherwise, continue...

After your bunny is fat enough for you, begin shaping the head, neck and belly with the felting needle.  Remember, the more you felt in one place with the needle, the more shaping you will get, such as shown around the neck above.

Roll up four small tube shapes out of the wool for feet.  It is nice to have just a little extra wool at the end to hold onto.  This prevents (or helps to prevent) sticking yourself with the needle.  You don't want to do that.  The needles are sharp and also fragile.  It also doesn't really help the design any to have blood on it.  Needlefelt each foot before attaching them to the body of the bunny. 

Here is our bunny with shaping done and the feet in place.  Secure the feet well with the felting needle, adding some thin bits of wool around where they are attached.  This helps so you don't see the connection as much and it will be more secure.

I like adding the upper part of the back legs to the rabbit.  This is optional, but I like it better.  Roll a small bit of wool into a flat circle.  Attach in proper place by back feet as shown:

Attach a bit of a white tail...

Add black nose and eyes and a little white on the tummy.  If you are ambitious and are not giving this to a toddler, you can use tiny black beads for eyes.  You may also stitch  whiskers on it.  I haven't done that yet, but I plan to on my next bunny!

Sleepy Bat

Terri Reinhart

I used a worsted weight tweed yarn for the bodies of the bats and I washed and felted an old black wool sweater for the wings.  You will need this or some black felt.   Size 5 knitting needles.  Also, buttons for eyes and a hook and eye fastener.

Body:  Cast on 20 stitches.  Work in Stockinette stitch for 2 1/2 inches.  Then begin decrease rows:

Row 1:  Knit 1, knit 2 together.  Repeat till the end of the row. 

Row 2:  Purl

Row 3:  Knit 2 together. Repeat till the end of the row

Row 4:  Purl

Row 5:  Knit 2 together.  Repeat till the end of the row.

Row 6:  Purl

You should only have about 6 or 7 stiches left.  Cut the yarn, leaving a 10 inch tail.  Thread through a yarn needle and pull through all the stitches.  pull tight and secure.  You can, at this point, go ahead and sew the back seam.  Do not sew the bottom.

Ears (make two)

Cast on 6 stitches.

Rows 1-4:  Stockinette Stich

Row 5:  Knit two together, knit two, knit two together

Row 6:  Purl

Row 7:  Knit two together, Knit two together

Row 8:  Purl

Row 9:  Knitting, increase one in the first and last stitches

Row 10:  Purl

Row 11:  knitting, increase one in the first and last stitches

Row 12:  Purl

Row 13 - 16:  Stockinette Stitch

Bind off

Feet (make two)

Cast on 5 stitches

Work in Stockinette stitch for 2 inches.

Bind off.

***

A bunch of bats? A bevy of bats?

Finishing:

Lightly stuff the body of the bat and sew across the bottom.  Put the two sides of the ear together and sew.  Sew ears to body (see photo).  Sew the feet to the bottom of the bat as loops so it can hang from a branch.  Cut wings out of black felt.  You might want to try cutting some out of paper first so you can get the size and shape that you want.  Sew on button eyes.  Attach a hook and eye fastener to the wings so that your bat can hang upside down and sleep!

Knitted Owl

Terri Reinhart

I used worsted weight yarn with a bit of texture to it. I’m not sure what kind it is but it was a small ball of leftover yarn from another project. I tend to knit like I cook. I don’t often follow patterns and this is a good example. I was trying to knit a bat and ended up with an owl. As they say in school, if you make a mistake, turn it into something beautiful. Like an owl.


#3 or #4 needles


Body:

Cast on 14 stitches. Knit in Stockinette Stitch until the rectangle measures approximately 7 – 8 inches. Fold it over lengthwise and see if it looks proportionately like a little owl should. Don’t use a ruler unless you just can’t resist. Bind off.


Wings: (make two)

Cast on 6 stitches. Work in Garter stitch.

Row 1: Knit

Row 2: Knit 1, increase 1 in next stitch, knit till the end

Row 3: Knit

Row 4: Knit 1, increase 1 in next stitch, knit till the end

Rows 5 – 7: Knit

Row 8: Knit 1, knit 2 together, knit till end

Row 9: Knit

Repeat these two rows until there is only one stitch left. Cut yarn, leaving a 3” tail, pull yarn through last stitch.


Feet: (make two)

With contrasting color, cast on 5 stitches. Work in stockinette stitch for approximately 10 rows. End with a purl row.

(As with the measurement for the body, use your own judgment here. Some yarns knit up larger than others. Those owls might need longer feet.)

Picot row: Knit 1, yarn over, knit two together, yarn over, knit two together

Next row: Purl, making sure you purl the yarn over stitches, too. You still have 5 stitches on the needle.

Continue with stockinette stitch until you can fold it over lengthwise (see the lovely TOES that the picot stitch makes?) and it is meets the other edge. Bind off.


Beak:

Cast on 4 stitches. Work in Stockinette stitch for 4 rows.

Next row: Knit 2 together, knit 2 together.

Next row: Purl

Cut yarn, leaving a 3” tail, pull yarn through the two remaining stitches.


Fold body lengthwise in half and sew together, stuffing with wool. Pull out the top corners just a bit with your fingers to make the ears show. Sew wings on either side. Fold over feet and sew each one together and then sew them onto the bottom of the owl. I sewed the top of the beak onto the face of the owl then sewed the “point” down as well, making it stick out just a little. I used two buttons for eyes, but if this is for a younger child (younger than age 3), you should embroider the eyes on with black yarn.


Resources for discount wool yarn

Terri Reinhart

When I find a good deal, I like to share it with you all.  As often as possible, I do like to patronize the small knit shops and keep them in business.  However, there are times when I just can't afford good yarn from these shops.  Especially if I have a large project or I am doing something crazy like knitting felted slippers for the entire family.  Then I look at these sites:

www.knitpicks.com  - lots of good wools, sock yarns, and a good assortment of colors.  They also offer free shipping on orders of $50.00 and over.

http://www.thesheepshedstudio.com/ - this site has Brown Sheep yarn and mill ends of wool roving from Brown Sheep, among other things.  I am impressed with their prices!  For those of you who know Brown Sheep yarn, their "Lamb's Pride" yarn, both worsted weight and bulky weight, are only $3.00/skein. 

http://www.paradisefibers.net/Discount-Yarn-mill-ends-s/125.htm - I'm just beginning to look through this one, but it does look promising!

When I find more, I'll keep you posted!!


Things to knit that you would never imagine knitting

Terri Reinhart

I figured that I should add these websites to this page. There are patterns out there for knitted items that are unusual, to say the least.  I doubt that you would use any of these in a Waldorf Kindergarten.  I just enjoy the creativity!  There are some patterns that are too "out there" for me!

But here are a few to enjoy:

http://blog.craftzine.com/archive/2008/08/how_to_knit_a_dissected_rat.html

http://blog.craftzine.com/archive/2008/01/dissected_fiber_frog.html

http://www.darkroastedblend.com/2008/10/strange-knits-and-yarn-monsters.html

http://knitty.com/ISSUEfall02/PATTveganfox.html

http://www.craftycrafty.tv/2007/05/scary_knitted_animals.html

http://api.flickr.com/services/feeds/photos_public.gne?id=91821907@N00&format=rss_200

I just showed these pictures to a couple of eighth grade boys and received their approval.  Unfortunately, with just a few exceptions, the patterns are not online, but have to be purchased.  I suspect, however, that with just a little trial and error, most of these could be figured out by other knitters.  The Vegan Fox pattern is online and I am hoping to make one of these soon. 

How to make a book binder's awl

Terri Reinhart

When I began teaching bookbinding, I needed to provide my students with proper tools, including a book binder's awl for piercing holes in each section of pages.  I couldn't afford to purchase enough for a class, so I decided to make my own.  It's ridiculously easy.  Basically, I just glue a needle in a cork. 

For each awl, you will need:  one cork - champaigne corks and corks from cream sherry work especially well, one needle - size 2 crewel needles, one pair of pliers, and tacky glue.

Using the pliers, make the hole in the cork for the needle by pushing the needle in point first.  Then take the needle out of the cork, put a bit of glue at the "eye" end of the needle and push that end in the cork, using the pliers.

What was so lovely is that I found these awls to be much, much better than the professional book binder's awl that I purchased! 


One more note:  I use the size 2 crewel needles to sew the books together, too.  By the time I've sewn two or three books, the needle is slightly curved.  This is what I want! 


Squirrel Pattern

Terri Reinhart

I use a sport weight wool. A nice one that is inexpensive is Lion Brand Yarn Fisherman Wool.  It comes in an 8 oz skein and I found it for about $10.00.  I only found this in two colors - natural white and brown.  An 8 ounce skein will make an awful lot of squirrels!

Body:

Cast on 18 sts, size 2 or 3 needles.

Work in garter st (knit every row) for approximately 20 rows.

Bind off

Sew each corner together for legs. Stuff with wool fleece and sew up tummy.

Head:

Cast on 12 sts

Work in garter st for approximately 6 rows.

Bind off

Sew two sides shut, leaving one open for stuffing. When it is stuffed, thread yarn on needle, gather the bottom opening, and sew to head with one of the seam sides to the front.

Ears:

Leaving a 3-4” tail, finger knit for 1 ¼”. Pull through head so that about ½” of knitting is showing on either side of head. Now pull the ends of the yarn through, close to where the finger knitted ear comes out of the head and, leaving the finger knitting to be a tiny loop, loose the end of the yarn in the body of the knitting and trim the end. Repeat the last step for the other ear.

Tail:

I use a large stitch holder to make the tail.

Wrap yarn around the stitch holder thickly, to the desired length.

Stitch with yarn tightly down the center of the wrapping.

End with a strong knot. Cut the loops and fluff up. Sew to tail end of squirrel.


Snails and slugs

Terri Reinhart

These are a perfect use for all the leftover bits of sock yarn.  I found a pattern for these to be knit in the round on double pointed needles, however, that sounded like torture to me.  I adapted the pattern to be knit on two needles.

Slug:

On size 0 or 1 needles, cast on 4 sts.

Row 1: Knit

Row 2: Purl

Row 3: Knit, inc 1 in 1st and 3rd stitches (6 stitches)

Row 4: Purl

Row 5: Knit, inc 1 in 1st and 4th stitches (8 stitches)

Continue knitting and purling till slug measures approximately 1 ½ inches long.

Pull yarn through needle and stitch opening, stuffing a tiny ball of wool in the end to create a head.

Finger knit for about 1 ¼” for horns. Pull through head and weave ends back through horns, losing the yarn in the body. Trim end of yarn.

Snail Shell (to go on slug):

On size 0 or 1 needles, cast on 12 sts.

Row 1: Knit

Row 2: Purl

Row 3: Knit, inc 1 in 1st and last stitches (14 stitches)

Row 4: Purl

Row 5: Knit, inc 1 in 1st and last stitches (16 stitches)

Row 6: Purl

Continue knitting and purling rows without increasing for four more rows.

Row 11: Knit 2 together, knit 2 together, knit till last four stitches, knit two together, knit two together

Continue knitting and purling rows till the entire shell measures approximately 3 inches. Pull yarn through stitches and sew opening, stuffing lightly as you go. Twist into tight spiral and sew together. Sew to slug body.

A Project for Warmth

Terri Reinhart

A Project for Warmth - written in March of 2004

Father Sun came out on a winter’s day

And melted all the snow away

And called to the flowers, asleep in their beds,

“Wake up! Wake up, you sleepyheads!”

But the flowers stayed snug in their earthy beds

And gently shook their sleepy heads

And said, “Father Sun, don’t tease us so,

We know it’s still winter, and soon again will snow.”

And fast asleep they did go.

And sure enough, the very next day

The Snow King chased

Father Sun away!

In Colorado, the winter temperatures can vary from below zero to the 60’s. As I write this in mid-March, we are having a snow day because of a blizzard that is expected to dump two feet of snow. Five days ago, the temperature hit 78 degrees! It is so difficult it is to know how to dress our children properly! And it is so frustrating to send heavy winter coats only to have the temperature rise to 60 degrees by outside time making it challenging to keep coats on the children when it is too warm for heavy coats and too cold to go without coats! We can also have bitter cold winter days and then we need extra warmth in the classroom as well as outside. Many children do not dress warmly enough.

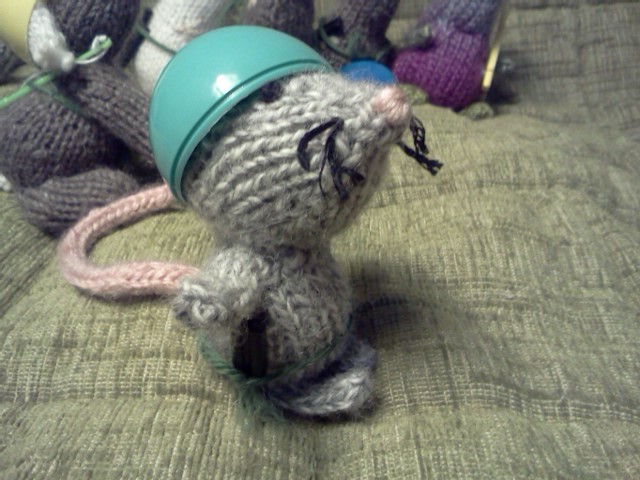
With these challenges in mind, we embarked on a major project this year: making boiled wool (felted) vests for each of the children in the kindergarten! And the project has had some wonderful “fringe benefits” that we didn’t expect! We started making the vests in November and just now, in March, are we finishing the last two sweaters. It is so wonderful for the children to see this type of purposeful work done day after day (week after week, month after month)! The older children in our class (all boys in our case) were very interested in their vests and did most of the sewing themselves. The younger children played endlessly with our large tin of buttons at my feet. The children have chosen the buttons and pockets for their vests and helped to decorate them. They are so involved in the process, regardless of whether they are actually sewing, looking through buttons, or just seeing us sew day after day, that they really, truly want to wear their vests as often as possible.

As we explained to the families what we were going to do and why we had chosen this project, we realized that it made for very effective parent education. Not only were we talking about it, we were doing something as well. After speaking to the parents about the project, suddenly more children came in wearing undershirts and leggings under dresses!

The first step was to ask each family to send in an old wool sweater. Thrift shops were a good source for these. Specifically, they were asked to send:

A 100% wool sweater, NOT marked washable (not cashmere, either)

Merino wool works very well as does Lamb’s wool and Shetland wool

Ladies medium (this seemed to be the most reliable size)

Pullover, not button-down

Preferably with long sleeves

Fairly tight weave

NOT loose weave, bulky knits

There can be an “all over” color pattern but not a patterned yoke (the pattern will shrink differently)

We did not specifically ask for extra sweaters, they came in anyway —which was good, as shrinking sweaters is not an exact art and it was helpful to have the extras around when one shrunk too small.

I took the sweaters home and washed them in HOT water with a COLD rinse. Then put them in the dryer. If a sweater didn't seem to shrink too much, I put it through again. When all the sweaters had been washed and felted (shrunk), I cut off the sleeves and cut through the middle of the sweater from the collar to the waist. I did NOT do this step in front of the children! With the sleeve material, I cut pockets of all colors. There is also enough material left over to cut into smaller pieces for the children to use for their own sewing projects. No need to worry about the edges. They are felted and won’t fray. The sweaters that shrunk down too small were made up and given to younger siblings. The extra sweaters were all made up and are often used by first graders who need an extra layer. When a sweater just wouldn’t shrink down enough, it was time for some creative alterations. Fortunately this only happened with a couple of sweaters!

In the classroom, we took the vests, one by one, and did a blanket stitch with wool yarn, around all the cut edges. The older children learned to do the blanket stitch themselves, helped by this simple verse:

The silver fish swims through the sea

Catch him in your net, as quick as can be!

But this little fish swims so well,

All we catch is the tip of his tail!

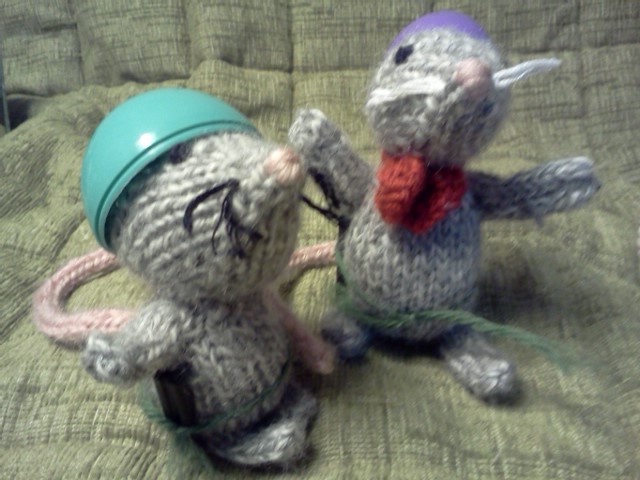
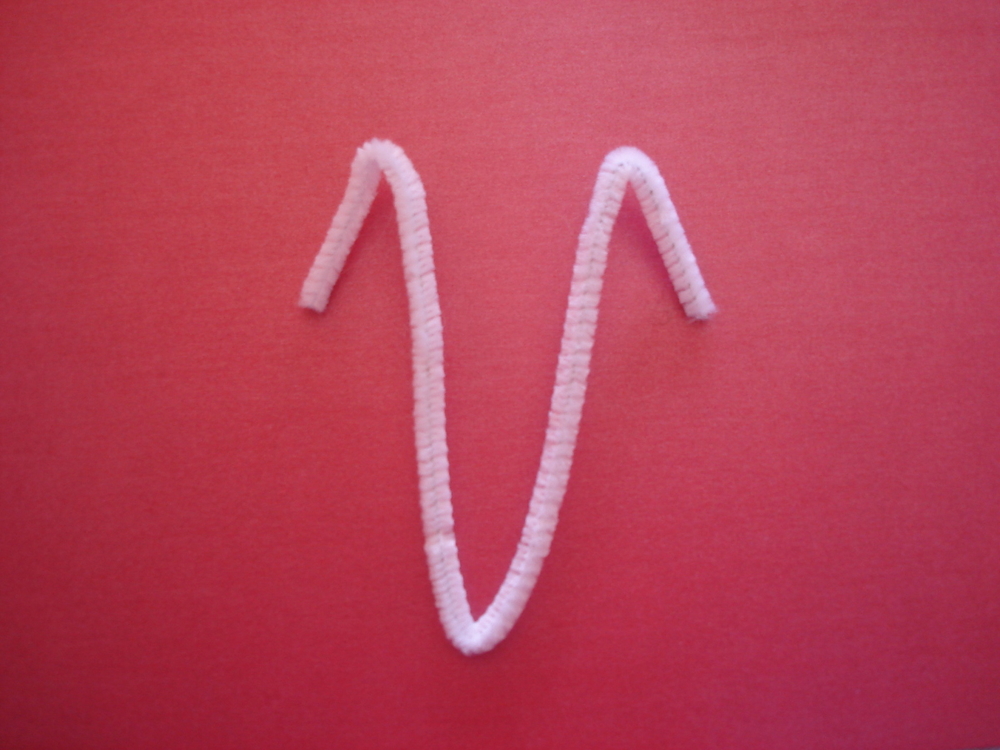
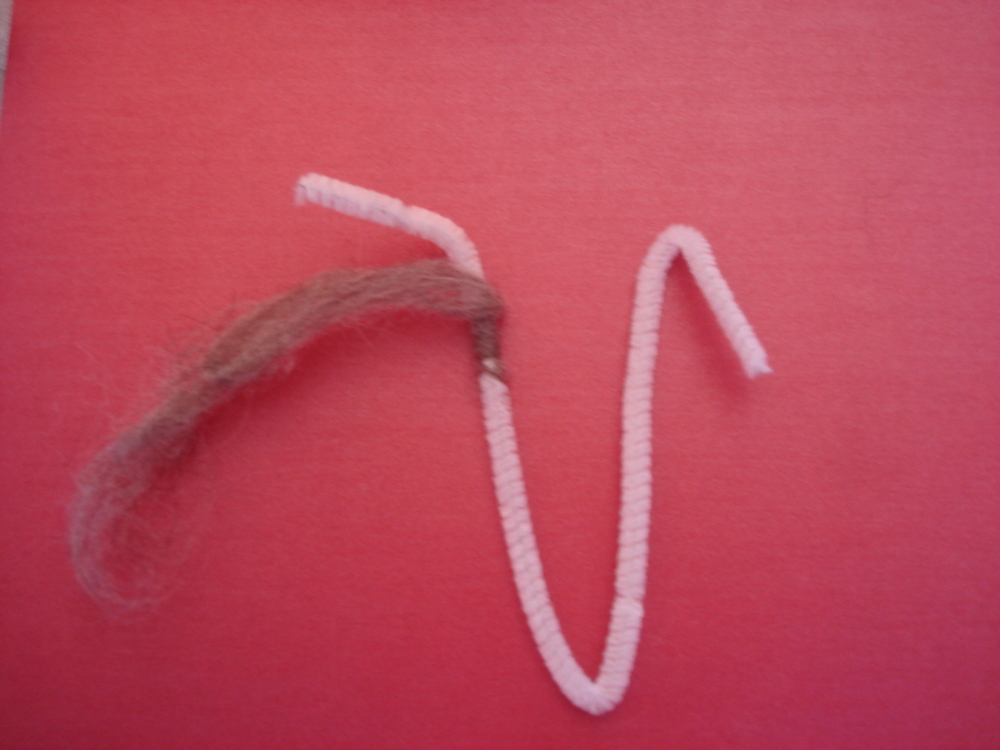
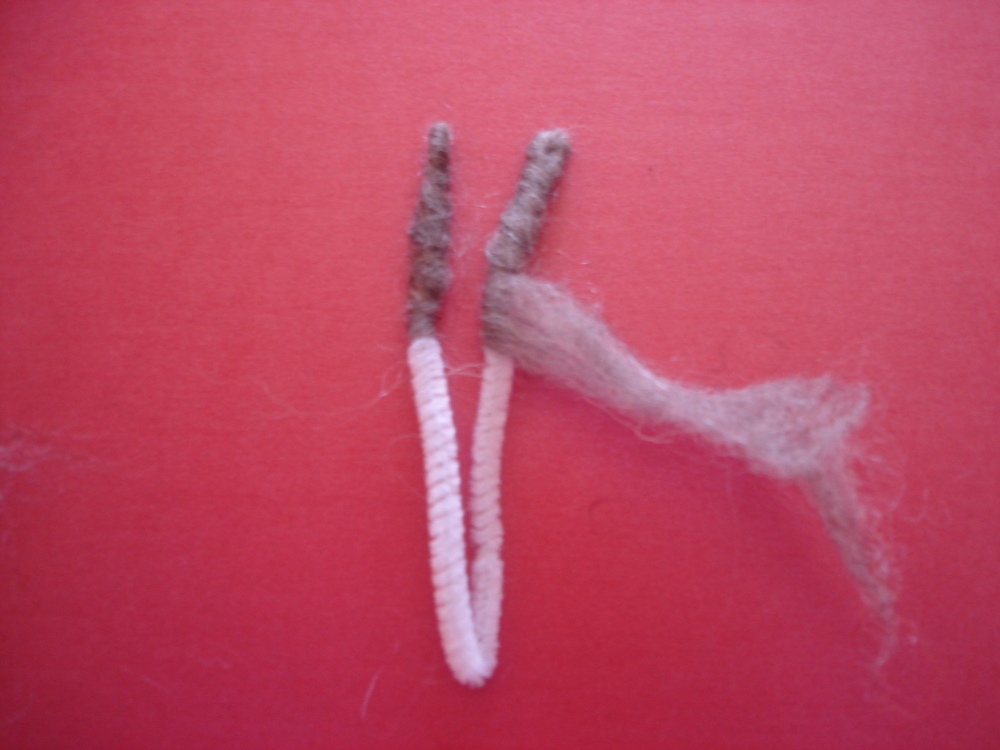
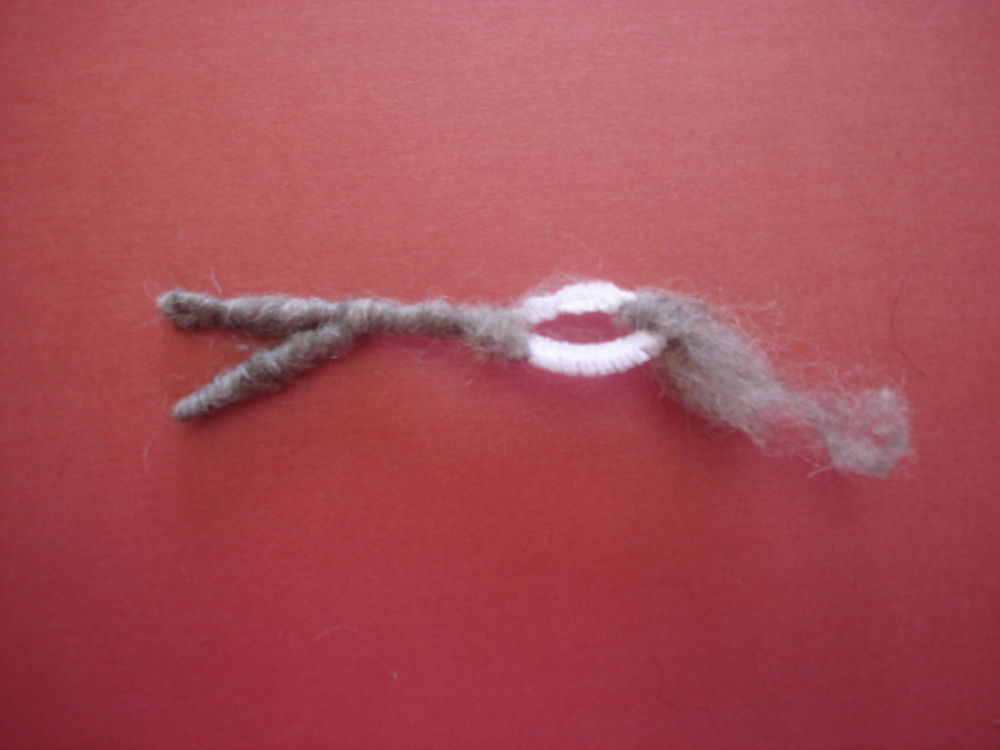
Then came the pockets, chosen by the children, and the buttons, also chosen by the children. The button loops were finger knit and sewn on. And, of course, many embellished their sweaters with extra buttons! When each vest is finished, the child is excited to wear it. One child wore his home under his coat, as he just had to show his father.

Next year we must make hats!

Terri Reinhart

Woodrose Kindergarten

Denver Waldorf School

P.S. The winter storm officially dumped a total of 31 inches of snow in three days! One friend of mine who lives in the mountains got 7 feet of additional snow with this storm! All in time for the first day of spring.


Resources for wool and felting

Terri Reinhart

Suppliers for wool

West Earl Woolen Mill

110 Cocalico Creek Rd
Ephrata, PA 17522
717-859-2241

West Earl Woolen Mill has Peruvian wool batting and wool roving. This is white, not dyed wool. They don’t have a website so you will have to call. Be sure to pay attention to the time zone! I think this is also their home phone. Their prices are the best I’ve ever seen for wool batts.

**********************

Brown Sheep Company, Inc.
100662 County Road 16
Mitchell, Nebraska 69357
1.800.826.9136 - FAX 1.308.635.2143

Wool Roving: $9.80/lb or $7.20/lb for a whole bump (25 lbs or more)

***************************

Dyed Wool

The Recycled Lamb

2010 Youngfield St.

Lakewood, COLORADO 80215

(303) 234-9337

www.recycledlamb.com

Earthsong Fibers

www.earthsongfibers.com

Both of these have dyed wool roving and batting starting at about $2.00/ounce.

******************************

Resources for felting needles:

http://www.feltcrafts.com/needle-felting-supplies.html - this company was started by a Waldorf parent.

http://www.woolery.com/Pages/felting.html#needlefelting - I always like to get a paper copy of this catalog. It's my favorite catalog to just look at. I am dreaming of getting a spinning wheel someday! Both of these companies offer the best prices I've found for felting needles.

http://www.weirdollsandcrafts.com/needle-felting-roving/felting-needle-supply.html - I had almost forgotten this company.  They have good prices on their felting needles!  And lots of other fun stuff.

******************************

www.waldorfearlychildhood.org/sources.asp

This page lists many, many different sources for Waldorf teachers.

Some other pages to look at:

www.friendswoodbrooms.com (the most incredible handmade brooms I’ve ever seen)

www.recaddy.com (source for broom corn and broom making supplies)

www.woolpictures.com (Judit Gilbert’s wool pictures – very inspiring!) Hancock’s Fabrics in the Denver area often carries wool/rayon felt.

Also: www.ericas.com/fabric/woolfeltyardage.htm has wool and wool/rayon felt

www.thefeltpeople.com has wool and wool/rayon felt – minimum $100.00 order

www.achildsdream.com has wool and wool/rayon felt pieces