contact us

Use the form on the right to contact us.

You can edit the text in this area, and change where the contact form on the right submits to, by entering edit mode using the modes on the bottom right.​


123 Street Avenue, City Town, 99999

(123) 555-6789

email@address.com


You can set your address, phone number, email and site description in the settings tab.
Link to read me page with more information.

Craft patterns

​In which one may learn many useful things, such as how to knit a bat or needle felt a bunny.

Filtering by Tag: needle felt

30 Days of Crafting - a needle felt dandelion

Terri Reinhart

Here is the finished dandelion so you know what yours will look like.  You'll need wire (22 gauge florist wire), needle nosed pliers, green wool, white wool roving, a felting needle, and a foam mat to felt on. Tomorrow I'll add some photos of other types of flowers made in the same way.

dandelion.jpg

Start by making a wire form like the one below. I use a 22 gauge floral wire. 

2013-10-01 19.29.34.jpg

Wrap the wire with green wool. The ground can be a different color green or it can be the same as the stem. Felt the bottom part. You probably won't have to felt the stem, just wrap it tightly, pulling the last bit thin and continuing to wrap, even with just a few threads of wool. Do not wrap the loop on top!

2013-10-01 19.30.13.jpg

Now comes the fun part! Take a thin "rope" of wool roving - it must be roving - and wind in through the loop over and over, leaving a finger's width of space. Sometimes I thread the wool through a large blunt sewing needle. It makes it easier to go through the wire loop. 

2013-11-02 21.38.12.jpg

Wrap the wool through the loop until it is full. Then you will pull all the loops up towards the top of the wire loop and, with your needle nosed pliers, pinch the wire closed. Your dandelion will look a little shaggy at this point. 

2013-11-02 21.42.46.jpg

Now it's time to clean it up a bit. Add more green to the stem so it is completely covered. Cut the loops with a sharp scissors and trim your dandelion down so it's more or less globe shaped. Don't overdo it. It's easy to see little uneven spots and keep trimming until there's nothing left! 

2013-11-02 21.49.59.jpg

Now you have a nice, neat flower that is ready for leaves. This I'm leaving more to you. I'm not sure my leaves look all that much like dandelion leaves. Anyway, you use the basic needle felting technique with a somewhat leaf shaped blob of wool and you work on it until it is shaped the way you want it - or until it's close enough to what you want. The next photo is a close-up of one of my leaves.

2013-11-02 21.52.27.jpg

30 Days of Crafting

Terri Reinhart

It's November, which means a lot to writers. I signed up this year to be a part of NaNoWriMo or National Novel Writing Month. This is when authors, professionals, beginners, and everyone in between, go into a frenzy and attempt to write 1666 words per day to a total of 50, 000 words for the month.

It's also NaBloPoMo or National Blog Posting Month. The idea is to write a post on our blog every single day for the month of November. I wasn't sure about this one at first, but I'm going to give it a go. Instead of articles, I will post a craft project each day. This is because I'm also getting ready for a craft fair in early December. 

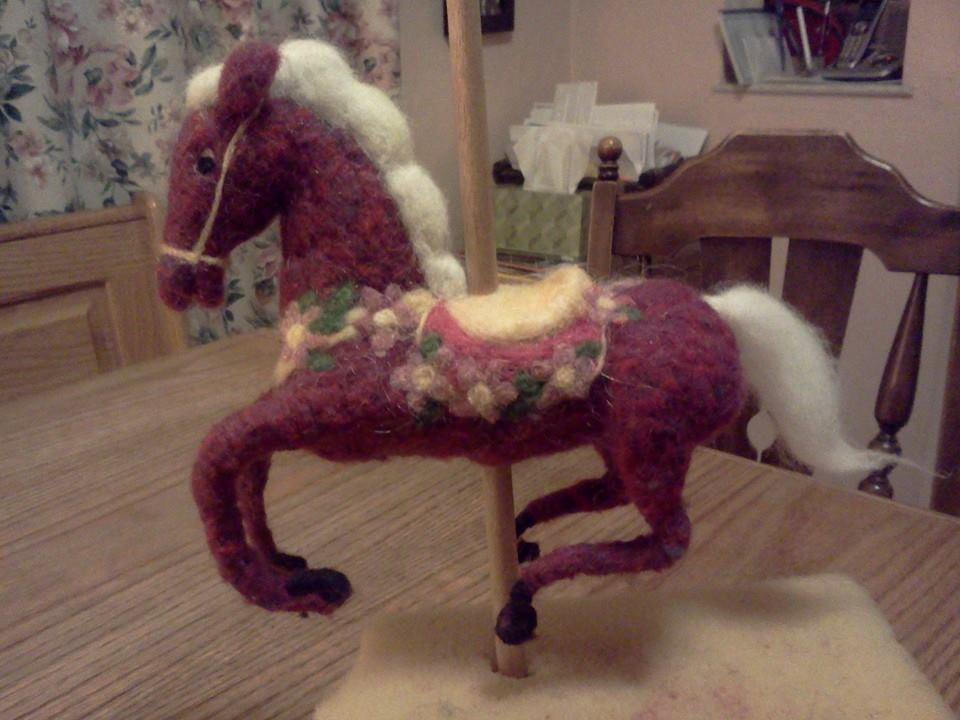
This first picture is my first attempt at a carousel horse.  Eventually, there will be up to 8 horses on a wooden carousel. I will post updates. I also hope to put up as many instructions for making these figures as I can.  


943721_10152053543697275_1312815068_n.jpg

Sally's gnome

Terri Reinhart

Often when someone follows one of my patterns, they end up with a finished project so uniquely their own, I just have to post a photo!  I love the addition of the bird, mouse, and bunny.   Thank you, Sally, for sharing with us!!

​congratulations Sally!